Replacing a furnace or heat pump is the moment to fix the quiet problems that have nagged your home for years: cold bedrooms, a noisy return, a short-cycling thermostat, and utility bills that never quite match the promises on the yellow EnergyGuide label. Heating replacement is not just about the shiny new box. The ductwork that carries air to and from that box is the rest of the system, and it often needs more attention than anyone budgets for. With some planning and disciplined testing, sealing, and balancing, you can turn a routine heating unit installation into a measurable improvement in comfort and efficiency.
Why the ducts set the ceiling for performance
Every furnace or air handler relies on a pressure difference to push a specific volume of air through the supply and back through the return. The manufacturer expects a certain airflow at a certain external static pressure. If your ducts are leaky, undersized, or poorly balanced, the system spends its life trying to breathe through a straw and into a colander. That mismatch shortens equipment life, raises energy use, and creates rooms that are always wrong.
In the field, I rarely see a complete heating system installation where the ducts were originally sized for modern airflow standards. Many homes built before the early 2000s have pieced-together trunks, too few returns, and long flex runs crushed under storage boxes. Replacing the equipment without correcting duct issues is like putting new tires on a car with bent wheels. The ride improves a little, but the problem remains.
What good sealing really means
Sealing is not slapping cloth-backed “duct tape” on metal seams. That tape dries and falls off. Good sealing is permanent, durable, and targeted at pressure boundaries.
At the joints and seams of metal duct, use a water-based duct mastic brushed on 1 to 2 millimeters thick, pushed into the seam, then smoothed. On wider gaps, back it with fiberglass mesh. For round takeoffs and boots, a proper foil tape rated UL 181 may be appropriate, but press it down hard with a squeegee and mastic the edges. On flex duct connections, tighten a metal draw band over the inner liner, not just the insulation jacket, and mastic the joint before insulating.
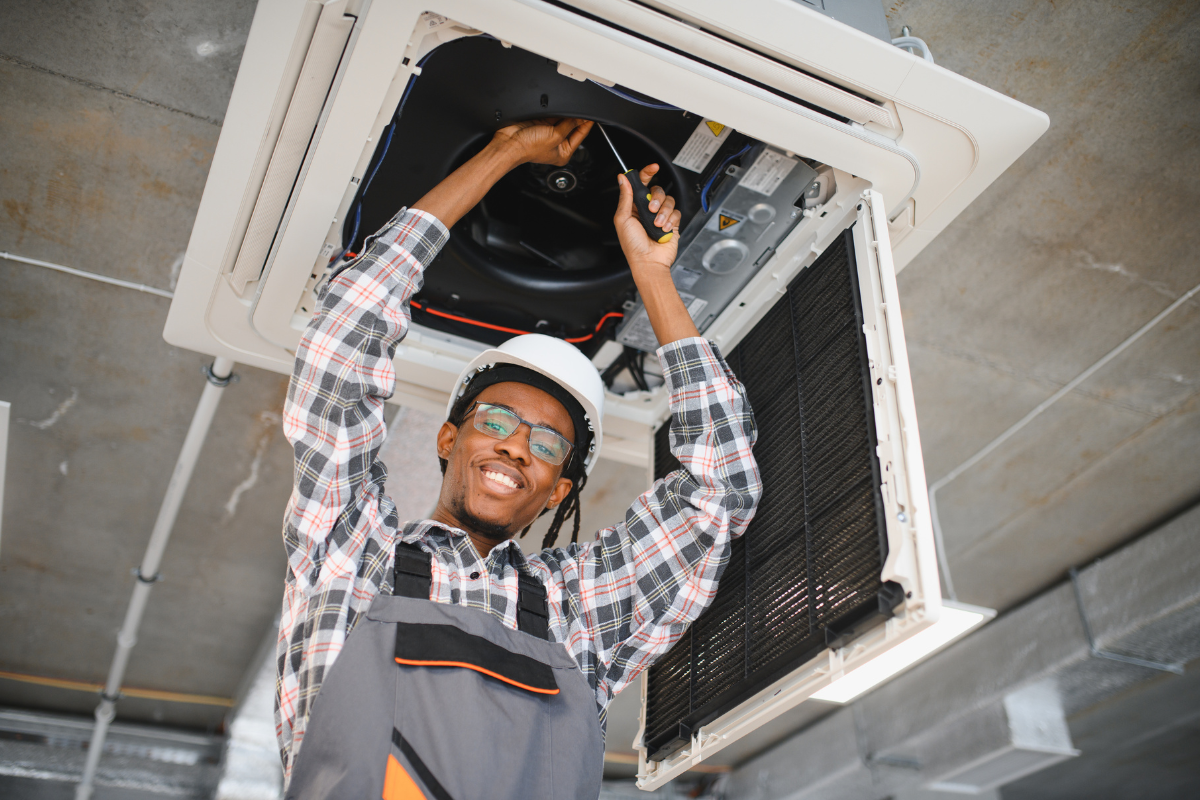
The air handler cabinet itself often leaks more than all the field joints combined. Check the panel gaskets, electrical penetrations, and the return side of the coil cabinet. Sealing those cabinet leaks matters because they occur at higher pressure, so the flow loss is greater. A bead of HVAC silicone or mastic at cabinet seams, plus replacing missing gaskets, can reclaim meaningful airflow.
One detail that separates average sealing from excellent sealing is attention to the building boundary. Seal boots to the drywall or subfloor so that the only path is through the grille. Otherwise, you are pulling air from wall cavities and crawlspaces or dumping conditioned air into them. I use a flexible acrylic sealant where the boot meets the finished surface, then reinstall the grille.
Measure first, not last
Sealing without numbers is guesswork. During a heating replacement, build in time to baseline the ducts before you disconnect anything. Two instruments transform the process from art to engineering: a manometer and a flow capture hood or anemometer.
Static pressure tells you how hard the blower is working. Measure external static pressure across the cabinet with the existing filter in place. Most furnaces expect a total external static pressure in the 0.5 inch water column range, sometimes lower on variable-speed models. If you see 0.9 or higher, you know you have a restriction problem, not just a small leak. Document supply and return side pressures separately. A return side higher than 0.3 hints at undersized or blocked returns, while a supply side above 0.25 suggests tight supply ductwork or restrictions at the coil.
Next, measure delivered airflow at several supply registers with a hood. If you don’t have a hood, a well-used vane anemometer with a capture funnel can work for relative readings. You will not get exact CFM at each register, but you will see which rooms starve. Make quick notes: master bedroom 55 to 65 CFM, kitchen 90 to 100, office 35 to 40. Those numbers will guide your balancing later and help justify any duct modifications to the homeowner.
Finally, run a duct pressurization test if your market allows it. Pressurize the duct system to 25 pascals with the equipment isolated and measure leakage to outside. In retrofits with unsealed ducts, leakage of 20 to 30 percent of system airflow is common. With diligent sealing, you can bring that below 10 percent, sometimes below 5. That improvement often saves more energy than the efficiency difference between two furnace models.
Choosing the right time during the heating unit installation
The best window to tackle sealing and balancing is after the old unit is out, before the new unit is set and strapped, while you still have working room. You can reach the main trunks, seal boots from the top, and correct obvious pathologies like a collapsed return. Once the new furnace or air handler is in the way, your options narrow.
I often stage the process in three passes. First, the gross mechanical fixes: add or enlarge a return, replace a kinked flex run with rigid or a shorter flex, and open tight transitions that choke airflow. Second, a detailed sealing pass on trunks, takeoffs, and boots. Third, post-install balancing with the system running, damper adjustments, and final tightness touch-ups. That rhythm reduces backtracking and keeps the crew organized.
Common problems I see and how to address them
The most frequent duct defect during heating system installation is a starved return path. A single 12 by 12 return grille on a 3-ton system cannot carry the volume quietly or efficiently. You either enlarge the main return or add a second return trunk feeding a new grille in a central hallway. When you add returns, mind filter location. If the furnace filter rack is small and hard to access, consider relocating to a return grille with a 4-inch media filter. It lowers pressure drop and encourages regular filter changes.
Long, small-diameter flex runs are next on the list. A 30-foot run of 6-inch flex that weaves around a truss, then sags in a duct hammock, will not deliver the 100 CFM the room needs in the dead of winter. Shorten the path, pull the flex straight and tight to eliminate corrugation drag, support it every 4 feet with 1.5-inch-wide straps, and upsize to 7-inch if the load demands it. Where possible, replace long flex with round metal pipe and use flex only for the final 3 to 6 feet to the boot.
Improperly sealed panned returns show up in older homes. A joist cavity used as a return, open to the basement or crawlspace, is a recipe for dust, odor, and high leakage. Fabricate lined, sealed return boxes instead. If you must use building cavities to meet budget, line them with rigid duct board, mastic every seam, and block all alternative pathways. The goal is an airtight duct, not a path of least resistance.
Poorly located supply registers seem harmless, but they cause comfort headaches. A ceiling register blowing across a room with tall south-facing windows might be fine for cooling, but for heating you want throw that washes the glass to counter downdrafts. Where the architecture allows, position supplies to condition the perimeter. If relocation is unrealistic, adjust the grille type and blade setting to direct heat where it matters.
Finally, the coil and filter rack often choke the system. High-efficiency filters are popular for marketing reasons, but a 1-inch MERV 13 filter on a medium frame variable-speed furnace can double the pressure drop at the blower and cut delivered airflow. Use deeper filters, 2 to 4 inches, to lower resistance. Verify the coil is sized and oriented correctly, with clean fins and no shipping block-offs left in place.
Balancing is part science, part patience
Balancing is the process of adjusting dampers and, if necessary, fine-tuning duct diameters so each room gets the airflow it needs. You balance after sealing because leaks change the distribution. Start by opening all dampers fully, including manual balancing dampers at the takeoffs. Set blower speed to meet the total airflow target for the new equipment. For heating, that often means 350 to 450 CFM per ton of cooling capacity on a furnace with an integrated evaporator coil. Heat pumps may run higher airflow to maintain coil performance.
Next, use your earlier register readings as a guide. If the office was at 40 CFM and needs roughly 75, and the kitchen was already at 100 but only needs 70, begin throttling the kitchen’s branch slightly and watch the office rise. Work in small increments and allow the system to stabilize after each adjustment. Err on the side of feeding perimeter rooms in the evening because those rooms feel inadequately heated when outdoor temperatures drop.
When dampers alone cannot correct large imbalances, look at the duct sizes. A trunk feeding two bedrooms with identical 6-inch runs may work on paper, yet the run with two extra elbows performs worse. Upsize that run or swap the boot to a higher free-area grille. Sometimes the only practical solution is to add a dedicated run to a problem room. People accept a short drywall repair if it means the nursery is finally warm.
The thermostat location plays a quiet role in balancing. If the thermostat sits in a hallway that gets air from a return but no supply, it will sense colder air than the bedrooms and end the cycle early, leaving rooms chilly. When you replace the heating unit, consider relocating the thermostat to a representative room or adding a remote sensor in a space that drives comfort expectations, then configure averaging. This is a small-cost change with outsized impact on perceived balance.
Static pressure as your north star
After installing the new furnace or air handler, check external static pressure again. If your sealing and duct tweaks did their job, you should see a lower number than the baseline. A total in the 0.4 to 0.6 inch range is typical for many variable-speed furnaces with 2 to 4-inch filters. If the number is still high, do not crank the blower speed to brute-force airflow. That raises noise, increases electrical consumption, and can cause coil whistling. Go find the remaining restrictions: a pinched return elbow, a backdraft damper stuck in a horizontal duct, or a filter rack with a smaller cutout than the filter frame suggests.
Watch for imbalanced static between supply and return. If the return side is very high relative to the supply, the blower is starving. Add a return or open an existing path. If the supply side dominates, the coil or supply trunk is tight. An undersized A-coil casing is a frequent surprise in replacements. If the new coil is taller or has more rows, ensure the transition delivers full face area, not a funnel that forces air through a smaller rectangle.
Sealing materials and where they make sense
I keep three sealants in the truck and choose by application. Water-based duct mastic is the default for metal seams, takeoffs, and boots. It adheres well to cleaned metal and cures to a flexible, thick membrane. For cold or damp surfaces where mastic struggles, a high-tack butyl rubber foil tape rated UL 181B performs well, especially on round duct. Use a hand roller to press the adhesive into the metal. For the equipment cabinet and around penetrations, I prefer a neutral-cure silicone that tolerates vibration and temperature swings.
Insulation is not a sealant, but it is part of the outcome. After sealing, rewrap ducts with intact insulation and taped vapor barriers. In vented attics and crawlspaces, R-6 to R-8 duct insulation is a sensible minimum. It prevents condensation in shoulder seasons and reduces standby losses in winter. I have opened attics where the insulation jacket was slit for access and never repaired, leading to sweating in spring that stained ceilings. Small details like retaping a jacket prevent callbacks.
Coordinating with load calculations
Good balancing starts with a realistic room-by-room heat loss. If you do not perform a load calculation, you are guessing at airflow targets. During heating replacement, run a Manual J or a similarly rigorous process. Homes often have new windows, more insulation, or changed floor plans since the original system was installed. A bedroom that once needed 120 CFM might now be fine at 80.
Once you have room loads, translate them into airflow using the supply temperature you expect. On a gas furnace, with a temperature rise of 40 to 60 degrees, you can move less air per BTU than on a heat pump with a smaller rise. That difference matters. If you install a heat pump in a former furnace home, your ducts will carry more air for the same heat. That sometimes exposes restrictions that were hidden in heating mode and makes balancing more sensitive. Plan for it by opening up returns and, where possible, increasing trunk diameters.
Edge cases and judgment calls
Not every duct can be surgically corrected. In historic homes with plaster ceilings and limited access, you have to choose your battles. It might be better to add a high and a low return to a closed bedroom and accept imperfect supply flow, rather than tear apart finished ceilings to replace a long supply. You can also consider transfer grilles or jump ducts to relieve door-closed pressure imbalances that starve returns.
On small condos with ducted mini splits, static pressure limits are lower than on furnaces. A typical slim ducted unit expects a total external static of 0.2 to 0.4 inches. The difference between a smooth radius elbow and a square throated elbow shows up immediately in airflow. In these systems, balancing dampers can eat up too much pressure. Aim for friction-optimized ducts first, then minimal balancing at the registers.
Manufactured homes present another constraint. The underfloor trunk is often built into the structure and difficult to access. Focus on sealing boots from above, improving filter access, and verifying the crossover duct between halves is tight and insulated. A poorly attached crossover can lose a third of your delivered heat to the crawlspace.
Commissioning that proves the work
At the end of a heating system installation, I like to leave behind more than a warm house. I leave numbers. A short commissioning record builds trust and helps the next tech who shows up years later. It includes:
- External static pressure with filter type and size noted, plus supply and return split. Blower speed setting and measured total airflow method, whether through a TrueFlow grid, a pressure matching table, or an airflow hood sum. Duct leakage test result if performed, with pressure and percentage of flow. Room-by-room airflow readings at the supply grilles after balancing, annotated with room names. Thermostat configuration, including any remote sensors or averaging settings.
That simple list fits on a page and tells a clear story: the system can breathe, it delivers air where it should, and it was set up intentionally.
Cost, payback, and making the case
Homeowners often resist duct work because it feels invisible. The new furnace has a sticker and a brand. The duct mastic is buried in the attic. To make the case, frame the benefits in practical terms. Sealing and balancing reduce noise, cut dust, and eliminate cold rooms. Energy savings are real, though the range is wide. In older, leaky ducts, tightening from 25 percent leakage to under 10 can trim heating energy by 10 to 20 percent, depending on climate and runtime. In milder climates with shorter heating seasons, the comfort gains often matter more than the utility bill change.
Pricing varies by market, but as a share of a heating replacement, duct improvements that genuinely move the needle typically add 10 to 30 percent. That spend is not flashy, yet it protects the investment in high-efficiency equipment. A 97 percent furnace connected to a restrictive duct behaves like a 90 percent furnace in the real world because it short cycles, runs hotter, and wastes blower power. When you explain that, most people see the logic.
Practical workflow for crews
Field success depends on repeatable habits. Here is a compact sequence that has worked for us on hundreds of replacements without adding a day to the job:
- Pre-job: capture static pressure and a quick set of register readings, take photos of returns and suspect runs, propose at least one duct improvement in the quote. Day of removal: open access at key boots and trunks, fix the worst restriction, and seal reachable seams before setting the new unit. After set: adapt transitions carefully to preserve full face area at coil and filter, then seal cabinet penetrations and transitions tight. Startup: verify static pressure, set blower to target airflow, run the system for 15 minutes, and begin balancing adjustments with the original room readings in hand. Wrap-up: record final numbers, label dampers for future reference, and walk the homeowner through filter access and thermostat behavior.
That rhythm keeps the crew moving and bakes quality into the process rather than bolting it on at the end.
Small choices that prevent big problems
A few details pay dividends. Use turning vanes in square elbows on high-flow trunks to reduce turbulence and pressure drop. Choose supply grilles with the right free area; a decorative grille that looks great but cuts free area in half will erase an hour of balancing in one snap. Keep flex duct off hot flues and away from sharp edges, and protect it from service trades who crawl over it later. When you cut insulation, tape the jacket cleanly and fully, not with a strip that leaves gaps. And never stack filters. I have more than once found a 1-inch filter in the grille and another at the furnace, both loaded. The system could not breathe.
On gas furnaces, respect temperature rise. After balancing, measure the rise across the heat exchanger. If you professional heating unit installation are out of spec, adjust airflow or investigate restrictions. Running too hot shortens exchanger life. On heat pumps, check defrost cycle behavior after airflow changes. A starved coil may frost sooner, leading to more defrosts and less comfort.
When to bring in diagnostics beyond the basics
Most jobs resolve with the tools mentioned. A few stubborn systems benefit from advanced tests. A pressure pan can quickly identify leaky branches by measuring pressure at the grille with the fan running and the house depressurized. A flow grid at the return can give accurate system airflow without a hood. Thermal imaging helps spot missing insulation around boots and reveals hidden bypasses that steal heat in winter. If you are on a complex home with multiple zones and reports of whistling or hunting dampers, a data-logging manometer will capture pressure swings over a few days and point to duct collisions when zones open and close.
The payoff you can feel
The best sign of a successful heating replacement after sealing and balancing is silence. The return no longer howls when the filter is fresh. The bedrooms at the end of the hall reach setpoint without a space heater, and the furnace runs longer, steadier cycles rather than sprinting and stopping. The thermostat stops becoming a point of negotiation in the family because the setpoint finally means the same thing in every room.
Those outcomes do not happen by accident. They come from treating ducts as part of the system, not a fixed background. If you approach every heating unit installation with a plan to seal, measure, and balance, you will deliver results that last long beyond the warranty, and you will avoid the callbacks that chew up your margins in January.
Mastertech Heating & Cooling Corp
Address: 139-27 Queens Blvd, Jamaica, NY 11435
Phone: (516) 203-7489
Website: https://mastertechserviceny.com/